
For purpose of this tutorial, we will build simple expanse tracking
application. Every application development proccess include at least few
steps, and we will divide our process into:
- database design and table creation
- implementing CRUD model on our tables
- implementing reports for specific period
- implement user authentification and role based access
1. configure database access
Open protected/config/config.php file and configure access to your database server like this:
                // database driver
                WsConfig::set('db_driver', 'pgsql');
                // database host address
                WsConfig::set('db_host', 'localhost');
                // database port number
                WsConfig::set('db_port', '5432');
                // database name
                WsConfig::set('db_name', 'webiness');
                // database user name
                WsConfig::set('db_user', 'webiness');
                // database user password
                WsConfig::set('db_password', 'webiness');
In our example we use PostgreSQL server on localhost and database name,
user and user password are all configured to "webiness". If you preferr
MySql or MariaDB database server your configuration should look like:
                // database driver
                WsConfig::set('db_driver', 'mysql');
                // database host address
                WsConfig::set('db_host', 'localhost');
                // database port number
                WsConfig::set('db_port', '3306');
                // database name
                WsConfig::set('db_name', 'webiness');
                // database user name
                WsConfig::set('db_user', 'webiness');
                // database user password
                WsConfig::set('db_password', 'webiness');
2. design database
For our small project we will use two database tables. First will contain expanse categories and other will contain expanse records it self. If you use PostgreSQl enter this SQL code:
                CREATE TABLE expense_type (
                    id SERIAL PRIMARY KEY,
                    name VARCHAR(32) NOT NULL,
                    description TEXT
                );

                CREATE TABLE expense (
                    id SERIAL PRIMARY KEY,
                    expense_type INTEGER NOT NULL
                        REFERENCES expense_type(id) ON DELETE CASCADE ON UPDATE CASCADE,
                    entry_date DATE NOT NULL,
                    value NUMERIC NOT NULL
                );
and if you are using MySql or MariaDB then:
                CREATE TABLE expense_type (
                    id INTEGER NOT NULL AUTO_INCREMENT,
                    name VARCHAR(32) NOT NULL,
                    description TEXT,
                    PRIMARY KEY (id)
                )ENGINE = InnoDB;

                CREATE TABLE expense (
                    id INTEGER NOT NULL AUTO_INCREMENT,
                    expense_type INTEGER NOT NULL,
                    entry_date DATE NOT NULL,
                    value NUMERIC NOT NULL,
                    PRIMARY KEY(id),
                    CONSTRAINT `fk_expense_type`
                        FOREIGN KEY (expense_type) REFERENCES expense_type (id)
                        ON DELETE CASCADE
                        ON UPDATE CASCADE
                )ENGINE = InnoDB;
3. models
Models are part of MVC architecture. They are objects representing business data, rules and logic. In Webiness framework, you create model classes by extending WsModel class.3.1. creating model
Create two files that will refference to data in our expense_type and expense database tables.application/Models/Expense_typeModel.php:
                class Expense_typeModel extends WsModel
                {
                    public function __construct()
                    {
                        parent::__construct();
                    }
                }
application/Models/ExpenseModel.php:
                class ExpenseModel extends WsModel
                {
                    public function __construct()
                    {
                        parent::__construct();
                    }
                }
3.2. attributes
Models represent business data in terms of attributes. Each attribute is like a publicly accessible property of a model.You can access an attribute like accessing a normal object property:
                $model = new Expense_typeModel();

                // "name" is an attribute of Expense_typeModel
                $model->name = 'grocery shop';
                echo $model->name;
By default, if you call parent constructor in your model class
constructor then your model will be automaticaly filled with attributes
corresponding to your database table. You can have, also, other
attributes defined in your model class, based on your needs.
3.3. model classes as Active Record objects
Active Record provides object-oriented interface for accessing and manipulating data stored in databases.You can write the following code to insert a new row into the expense_type table:
                $model = new Expense_typeModel();

                $model->name = 'grocery shop';
                $model->save();
The above code is equivalent to using the following raw SQL statement,
which is less intuitive, more error prone, and may even have
compatibility problems if you are using a different kind of database:
                $db = new WsDatabase();

                $db->execute('INSERT INTO expense_type (name) VALUES (:name)', array(
                    ':name' => 'grocery shop'
                ));
In the same manner, like you can store records in database, you can do
other operations too:
                $model = new Expense_typeModel();

                // if record with id 3 exists then update record else store new record
                $model->id = 3;
                $model->name = 'college savings';
                $model->save();

                // get records with id 4
                $model->id = 4;
                $model->getOne();
                echo $model->name;
                echo $model->description;

                // delete record with id 5
                $model->id = 5;
                $model->delete();

                // get all records from table
                $res = $model->getAll();
                var_dump($res);
3.4. attribute labels
When displaying values or getting input for attributes, you often need to display some labels associated with attributes. For example, given an attribute named name , you may want to display a label Name of Expense which is more user-friendly. By default, attribute labels are automatically generated from attribute names and they are stored in model array columnHeaders. You change default label with:
                $model = new Expense_typeModel();
                $model->columnHeaders['name'] = 'Name of Expense';
Usualy you want to do this in your model class constructor after calling
parent constructor:
                $this->columnHeaders = array(
                    'name' => 'Name of Expense',
                    'description' => 'Description of Expense'
                );
For applications supporting multiple languages, you may also want to
translate attribute labels, so our model classes now will look like:
                class Expense_typeModel extends WsModel
                {
                    public function __construct()
                    {
                        parent::__construct();

                        $this->columnHeaders = array(
                            'name' => WsLocalize::msg('Name of Expense'),
                            'description' => WsLocalize::msg('Description of Expense')
                        );
                    }
                }
                class ExpenseModel extends WsModel
                {
                    public function __construct()
                    {
                        parent::__construct();

                        $this->columnHeaders = array(
                            'expense_type' => WsLocalize::msg('Name of Expense'),
                            'entry_date' => WsLocalize::msg('Date of Expense')
                        );
                    }
                }
4. controllers
Controllers are part of MVC architecture. They are responsible for processing requests and generating responses. Controllers are composed of actions which are the most basic units that end users can address and request for execution. A controller can have one or multiple actions. An action method is a public method in controller class.4.1. routes
End users address actions through the so-called routes. Routes take the following format:
ControllerID/ActionID
So if a user requests with the URL
http://hostname/index.php?request=site/index
, the index action in the
site controller will be executed.
4.2. creating controller
Create file with controller class that will contain three actions.application/Controllers/ExpenseController.php:
                class ExpenseController extends WsController
                {
                    public function expense_types()
                    {
                        $this->render('expense_types');
                    }

                    public function expenses()
                    {
                        $this->render('expenses');
                    }

                    public function expense_report()
                    {
                        $this->render('expense_report');
                    }
                }
We are now created three routes in our application
All our actions respond to request by rendering view file. If you follow
our tutorial step-by-step, when you enter listed links in your browser,
you should see an user error that indicates that view file is not
available.
5. views
Views are part of MVC architecture. They are code responsible for presenting data to end users. In a Web application, views are usually created in terms of view templates which are PHP script files containing mainly HTML code and presentational PHP code.Webiness framework use templates located in public/layouts directory. Name of default template file is defined in protected/config/config.php file:
                // default layout file for HTML/PHP rendering
                WsConfig::set('html_layout', 'webiness.php');
If you want to change layout file you can change that line in
protected/config/config.php
file or you can set layout property in
controller class action:
                class ExpenseController extends WsController
                {
                    public function expense_types()
                    {
                        // change default layout file for this action
                        $this->layout = 'my_layout';

                        $this->render('expense_types');
                    }
                }
5.1. organizing views
For views rendered by a controller, they should be put under the directory applications/views/ControllerID by default, where ControllerID refers to the lowercased controller name without Controller suffix.For example, if the controller class is PostController , the directory would be application/views/post.
5.2. creating views
Create sub directory expense in applications/views directory and put these three files in it: applications/views/expense/expense_types.php
echo 'here will be page for editing expense types';
applications/views/expense/expenses.php
echo 'here will be page for editing expenses';
applications/views/expense/expenses.php
echo 'here will be page that will show how much money we spend in some period';
If you now point browser to our previously defined routes, you should
see text that we put in our echo statments.
6. CRUD
Open again our controller file application/controller/ExpenseController.php and change code in expense_types() and expenses() actions to:
                public function expense_types()
                {
                    // create model
                    $model = new Expense_typeModel();

                    // send model to view
                    $this->render('expense_types', array(
                        'model' => $model
                    ));
                }

                public function expenses()
                {
                    // create model
                    $model = new ExpenseModel();

                    // send model to view
                    $this->render('expenses', array(
                        'model' => $model
                    ));
                }
Webiness framework has special class
WsModelGridView
which will do magic and create AJAX based CRUD for your models in
just two lines of code. So, change our views to this:
applications/views/expense/expense_types.php
                <div class="row">
                    <div class="column column-8 column-offset-2">
                    <?php
                        $grid = new WsModelGridView($model);
                        $grid->show();
                    ?>
                    </div>
                </div>
Now, if you open your application, you will see grid with data columns:
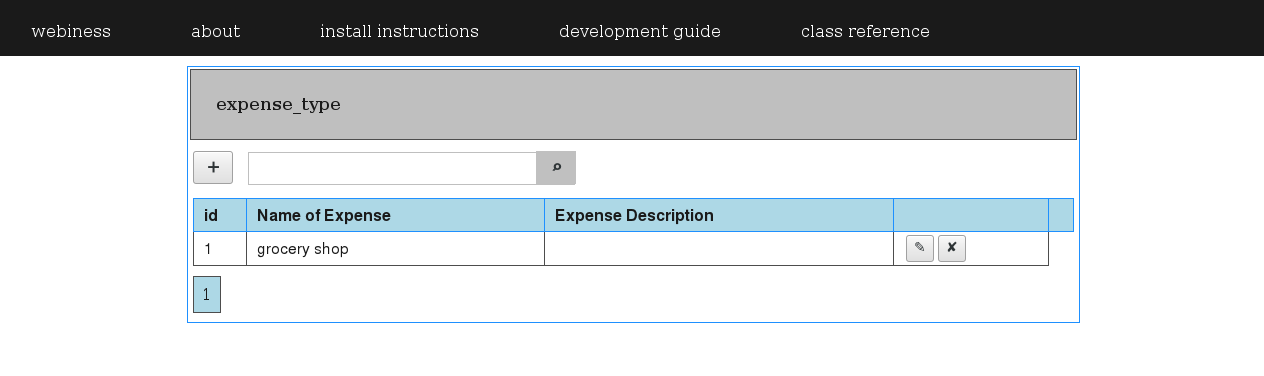
Grid has automatic ability for adding new items, searching, editing existing items and removal of existing items:
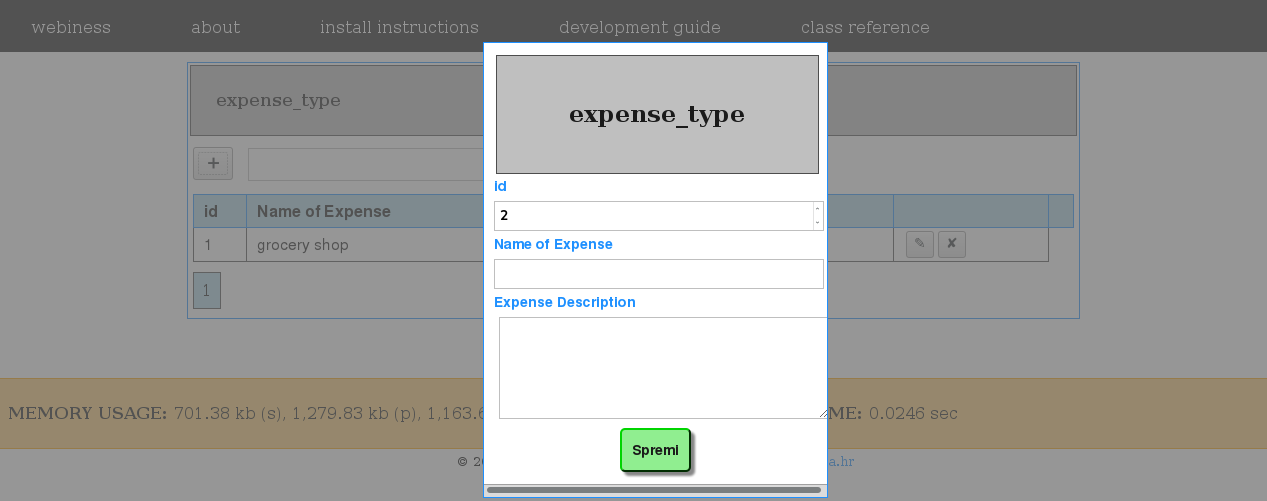
(adding a new item)
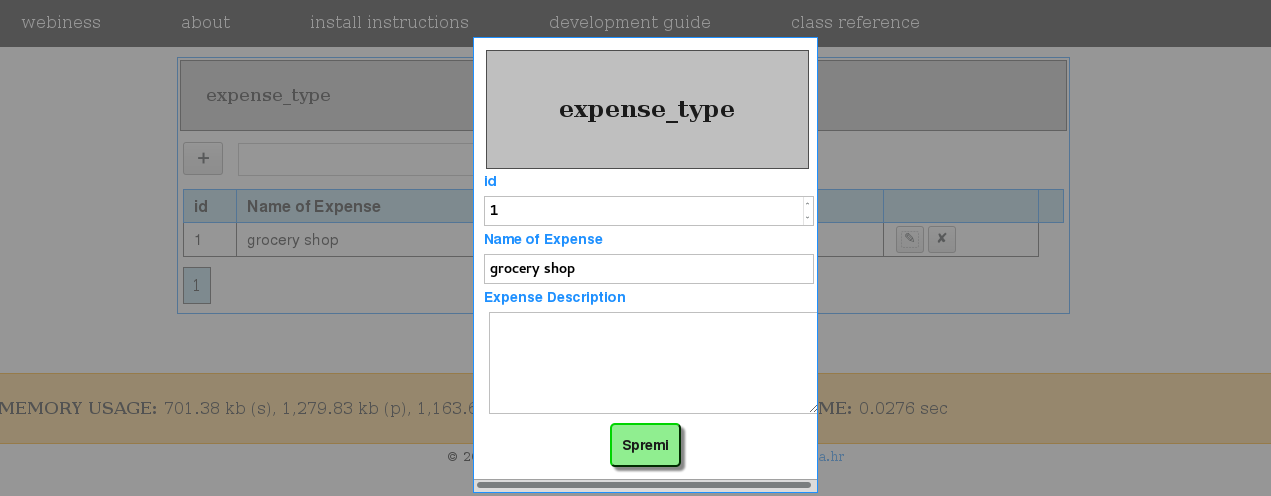
(editing an existing item)
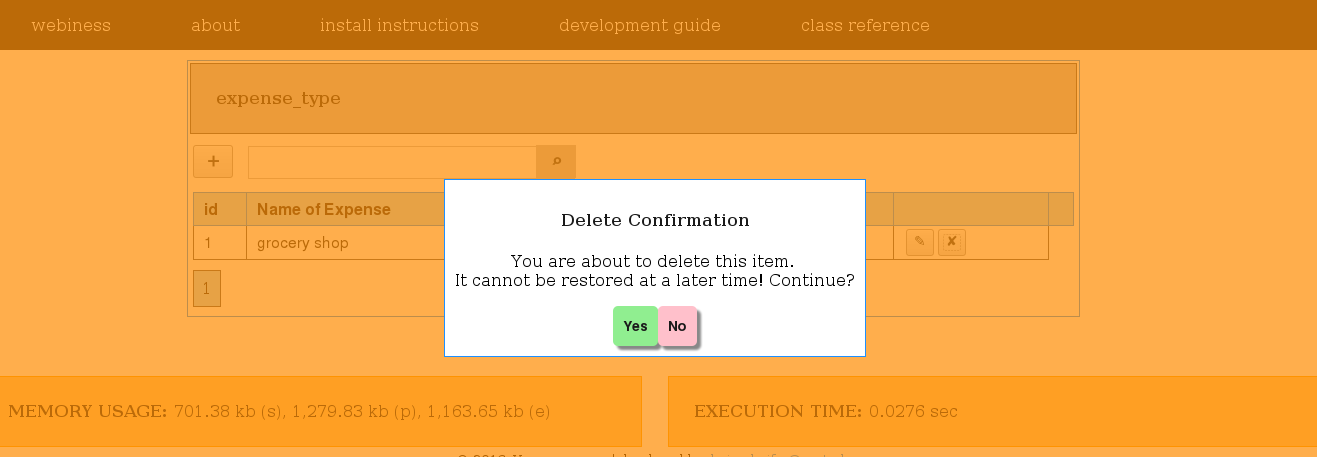
(removing an existing item)
6.1. customizing CRUD
When you open second page and try to add new item: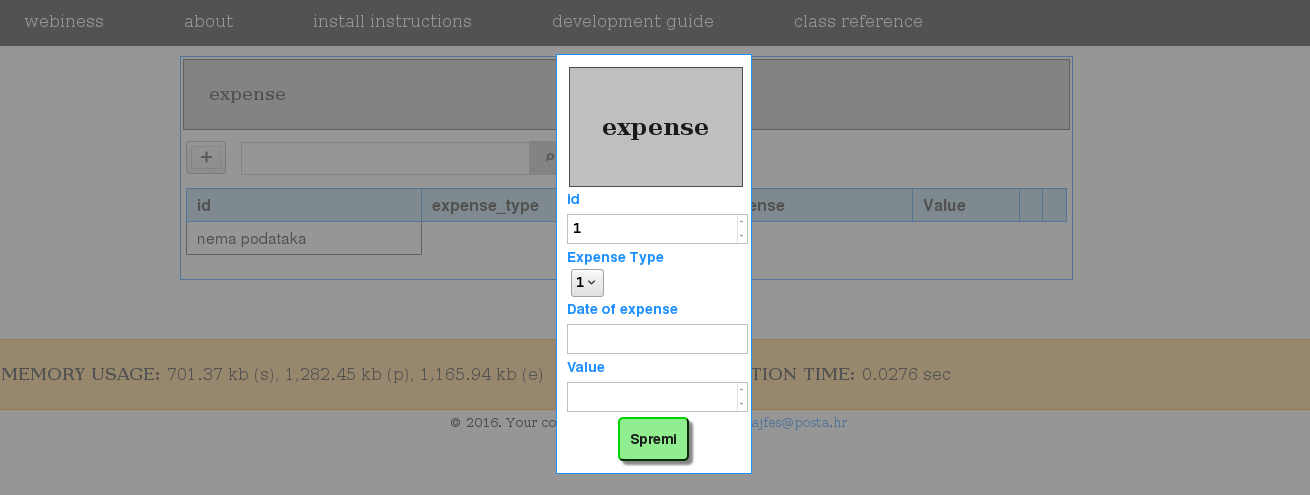
(removing an existing item)
you notice selection input control for foreign key. Like we sad before, model classes automaticaly detects foreign keys but in list we see IDs of foreign keys and that is not much user friendly and in most cases is not what you want.
To change that we will go back to application/Models/ExpenseModel.php file and add foreign key description array to our ExpenseModel class:
                class ExpenseModel extends WsModel
                {
                    public function __construct()
                    {
                        parent::__construct();

                        $this->columnHeaders = array(
                            'expense_type' => WsLocalize::msg('Expense Type'),
                            'entry_date' => WsLocalize::msg('Date of expense'),
                            'value' => WsLocalize::msg('Value'),
                        );

                        // show value of 'name' column when displaying foreign key
                        $this->foreignKeys['expense_type']['display'] = 'name';
                    }
                }
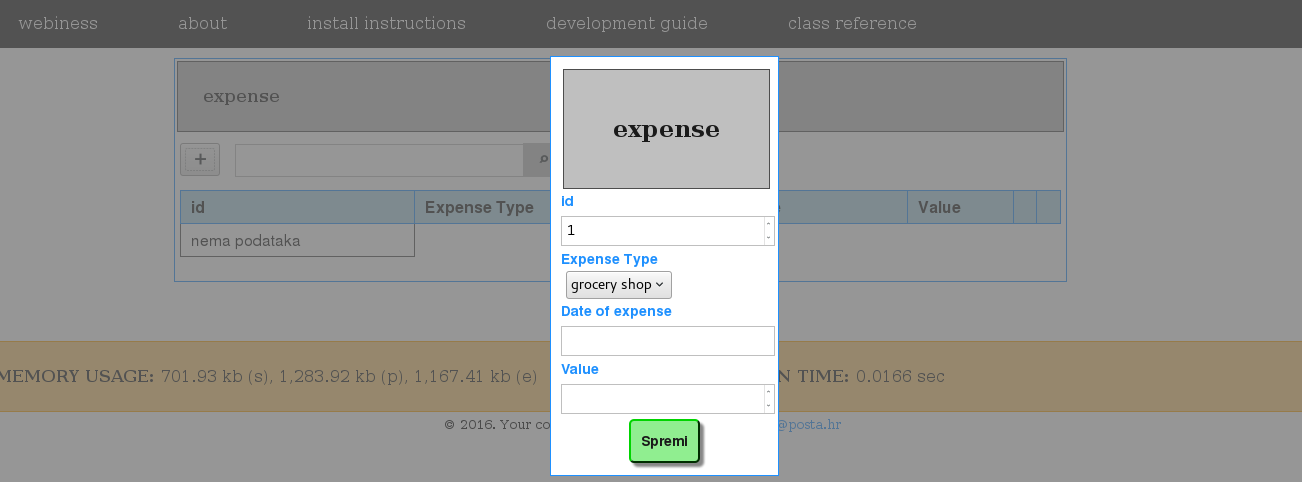
now we get desired values in our foreign key selection box:
also, we will change grids and dialog title so that it don't shows generic table name, and we will hide ID column from user:
                class ExpenseModel extends WsModel
                {
                    public function __construct()
                    {
                        parent::__construct();

                        $this->columnHeaders = array(
                            'expense_type' => WsLocalize::msg('Expense Type'),
                            'entry_date' => WsLocalize::msg('Date of expense'),
                            'value' => WsLocalize::msg('Value'),
                        );

                        // show value of 'name' column when displaying
                        $this->foreignKeys['expense_type']['display'] = 'name';

                        // set title
                        $this->metaName = 'My Expenses';

                        // hide ID column
                        $this->hiddenColumns = array(
                            'id'
                        );
                    }
                }
and final result will be:

Note:
In all our examples, and framework itself, we use coding style:
Webiness is compatible with PHP 5.3 and PHP 7.0 and higher, so you can use short array syntax and other modern elements of PHP language that are supported with your PHP version.
In all our examples, and framework itself, we use coding style:
                    $arr = array(item1, item2, ...);

                    <?php echo $var; ?>
instead of:
                    $arr = [item1, item2, ...];

                    <?= $var ?>
That's becouse we want to be compatible with lowest version of
PHP that we can, without using any deprecated features or need
to edit php.ini file and etc.
Webiness is compatible with PHP 5.3 and PHP 7.0 and higher, so you can use short array syntax and other modern elements of PHP language that are supported with your PHP version.
Now you are familiar with Webiness basics. Read our user authentication guide to learn how to use internal user authentication, authorization and role based access control system.